Posting programing codes or snippets on Google Blogger is not much readable, it does not provides coloured text as we see in any IDE. So, how can we paste code example on Google Blogger?
I don't and any gadget or other website link to do so. I just want to use only Google Blogger and my IDE where I execute my program.
After Googling on net, I find some suggestion to use tools available in Internet which are based on JavaScript or some other. I also found that some are suggesting to host code on Github gist to share code. But I don't want anything, in between my running code and my blog. So, I don't prefer to use this.
Yes, you can use screen shot of your code in blog to looks like any IDE like code, but is inefficient and if some one wants to use your code, he can't. It will also create problem when your code is bigger than your screen.
I don't know that whether such kind of tools are available in blogger or not. But I have used some tricks to paste IDE like code (codes in different colours) on my blogger posts. See how.
I use NetBeans IDE to write my codes. So write you desired programming code on NetBeans IDE, run it and if you want paste it then
Select all code by pressing Ctrl+A or by dragging mouse for some lines.
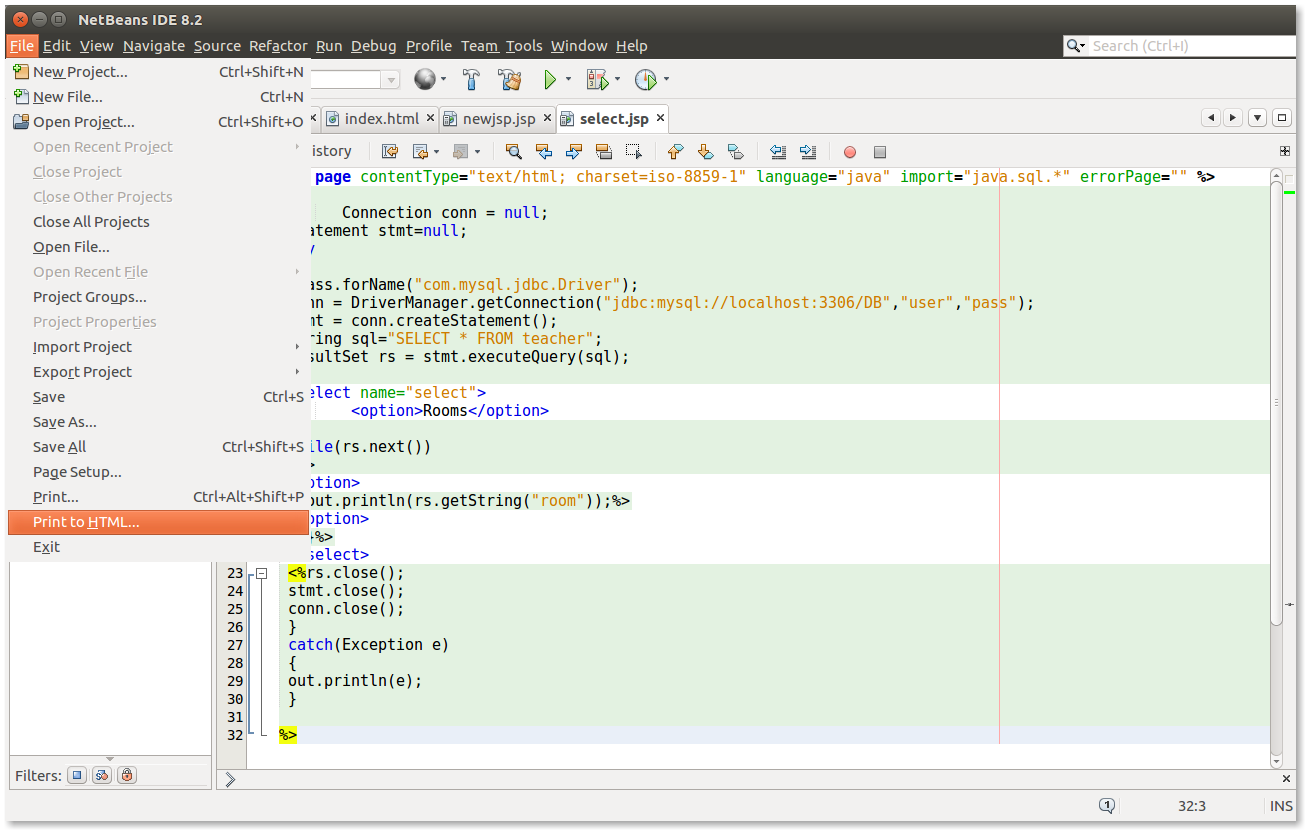
Then go to File and select print to HTML


index.html
I don't and any gadget or other website link to do so. I just want to use only Google Blogger and my IDE where I execute my program.
After Googling on net, I find some suggestion to use tools available in Internet which are based on JavaScript or some other. I also found that some are suggesting to host code on Github gist to share code. But I don't want anything, in between my running code and my blog. So, I don't prefer to use this.
Yes, you can use screen shot of your code in blog to looks like any IDE like code, but is inefficient and if some one wants to use your code, he can't. It will also create problem when your code is bigger than your screen.
I don't know that whether such kind of tools are available in blogger or not. But I have used some tricks to paste IDE like code (codes in different colours) on my blogger posts. See how.
I use NetBeans IDE to write my codes. So write you desired programming code on NetBeans IDE, run it and if you want paste it then
Select all code by pressing Ctrl+A or by dragging mouse for some lines.
Then go to File and select print to HTML
A new window will appear, Select Print to Clipboard and other checkbox option, like line numbers in code, then click OK

Now go on blogger site, Edit/New post and click on HTML tab available on left corner of your post editing page

After clicking on HTML tab, you will be entered in HTML mode of your blog writing. If you write code, then you can easily find that where you have to pest your code (which you have print to clipboard previously).
I have given a example to paste code below Sample text in my blog. See screenshot below-

Now it is done.
Sample-
| /home/arvind/NetBeansProjects/WebApplication1/web/index.html |
 1 <!DOCTYPE html>
 2 <!--
 3 To change this license header, choose License Headers in Project Properties.
 4 To change this template file, choose Tools | Templates
 5 and open the template in the editor.
 6 -->
 7 <html>
 8     <head>
 9         <title>TODO supply a title</title>
10         <meta charset="UTF-8">
11         <meta name="viewport" content="width=device-width, initial-scale=1.0">
12     </head>
13     <body>
14         <div>TODO write content</div>
15     </body>
16 </html>
17

"Your blog is absolutely fantastic and great
ReplyDeleteDigital Marketing Training Course in Chennai | Digital Marketing Training Course in Anna Nagar | Digital Marketing Training Course in OMR | Digital Marketing Training Course in Porur | Digital Marketing Training Course in Tambaram | Digital Marketing Training Course in Velachery
"
My faforite tool for coding is Codelobster IDE
ReplyDelete